BLOG - Product Reviews
Product reviews of cameras, accessories, prints and photography related services.
Lumix GX9 auto settings and modes for street photography
29th August 2020
29th August 2020
Lumix GX9 auto settings and modes for street photography
One of the most common questions from newcomers is ‘what settings should I be using for street shots”?
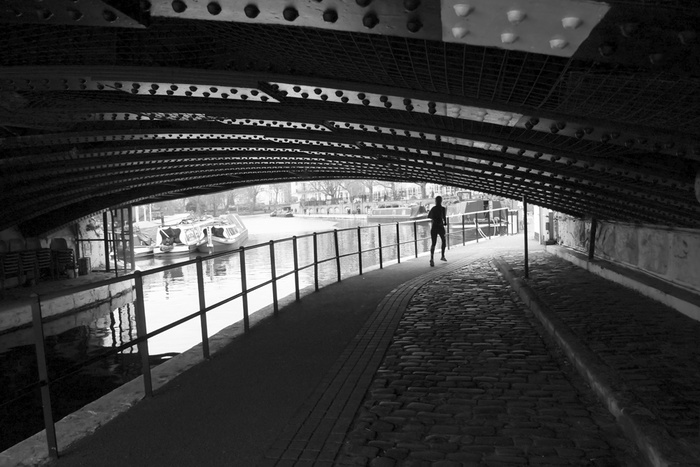
There isnʼt one straight answer to that, but it will depend on the type of photos you are wanting to make. In the case of street photography, unlike other genres, there are usually no second chances to shoot a candid moment as it happens. In addition, you probably want to focus your attention on ‘seeingʼ and less on worrying about camera technicalities. As you may have experienced, the most common technical issues a street photographer can hazard are motion blur from camera shake or moving people, overexposure or underexposure. These problems can be reduced if you take advantage of the GX9ʼs auto menu options.
Configuring these options is very easy as shown in the images.
Step 1.
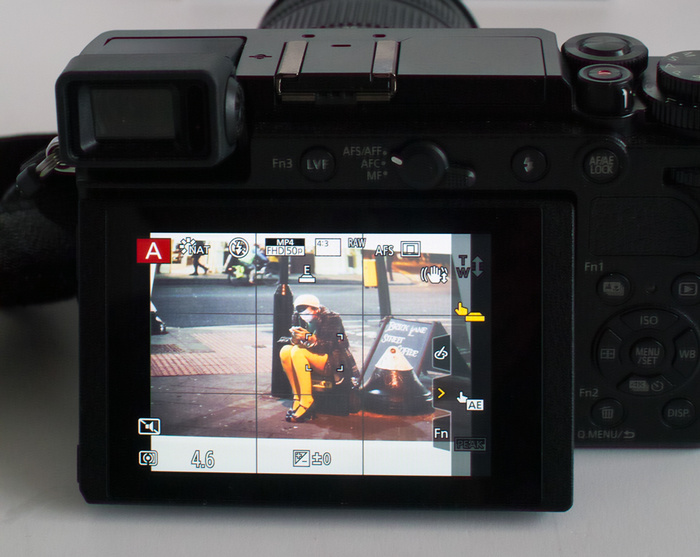
(A)perture or (P)rogram modes
In order to access the minimum shutter speed menu option, you need to be in either Aperture dial mode or Program mode. The option will be greyed out if you are in Manual or Shutter Speed mode.

Step 2.
Auto ISO
The next step is to utilise the Auto ISO setting (or selecting the highest suitable ISO value). Do bear in mind the higher the ISO number, the grainer your photos become. This ISO option is in the first menu under the camera icon.

Step 3.
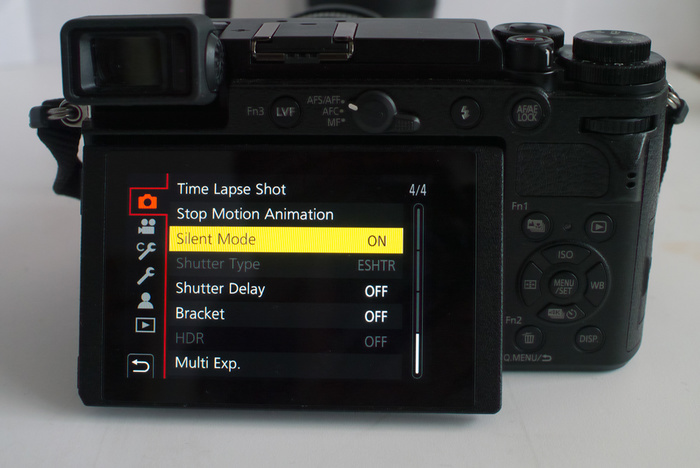
Minimum shutter speed
The GX9 model has built-in image stabilisation and also has a useful ‘Minimum Shutter Speedʼ option, which you can set to any standard value, i.e. 1/100, 1/80. This is particularly useful to avoid camera shake at too low shutter speeds around 1/40 or lower. This option is in the first menu under the camera icon.
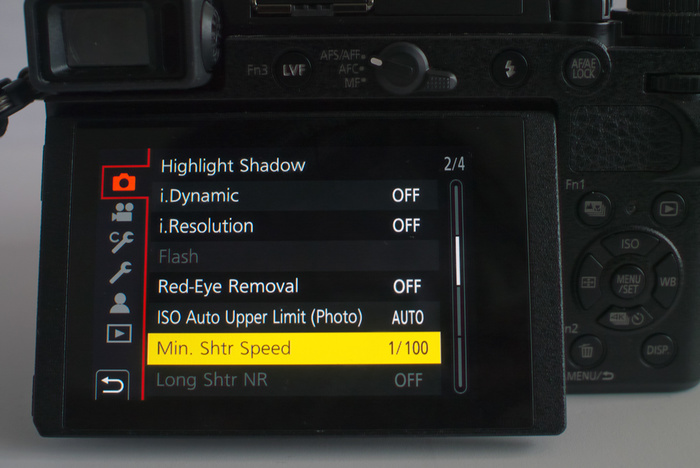

Once you have configured these settings and return to the main live view screen, you will see the minimum shutter speed you set will be displayed. As long as you have a wide enough Aperture range, along with your Auto ISO set in place, the chosen Shutter Speed should never go below the minimum value you set, thus minimalising the issue of motion blur. It is a nice option when shooting street and using Aperture priority mode.
One of the most common questions from newcomers is ‘what settings should I be using for street shots”?
There isnʼt one straight answer to that, but it will depend on the type of photos you are wanting to make. In the case of street photography, unlike other genres, there are usually no second chances to shoot a candid moment as it happens. In addition, you probably want to focus your attention on ‘seeingʼ and less on worrying about camera technicalities. As you may have experienced, the most common technical issues a street photographer can hazard are motion blur from camera shake or moving people, overexposure or underexposure. These problems can be reduced if you take advantage of the GX9ʼs auto menu options.
Configuring these options is very easy as shown in the images.
Step 1.
(A)perture or (P)rogram modes
In order to access the minimum shutter speed menu option, you need to be in either Aperture dial mode or Program mode. The option will be greyed out if you are in Manual or Shutter Speed mode.
Step 2.
Auto ISO
The next step is to utilise the Auto ISO setting (or selecting the highest suitable ISO value). Do bear in mind the higher the ISO number, the grainer your photos become. This ISO option is in the first menu under the camera icon.
Step 3.
Minimum shutter speed
The GX9 model has built-in image stabilisation and also has a useful ‘Minimum Shutter Speedʼ option, which you can set to any standard value, i.e. 1/100, 1/80. This is particularly useful to avoid camera shake at too low shutter speeds around 1/40 or lower. This option is in the first menu under the camera icon.
Once you have configured these settings and return to the main live view screen, you will see the minimum shutter speed you set will be displayed. As long as you have a wide enough Aperture range, along with your Auto ISO set in place, the chosen Shutter Speed should never go below the minimum value you set, thus minimalising the issue of motion blur. It is a nice option when shooting street and using Aperture priority mode.
Taking Candid Street Photography with the Lumix GX9
13th September 2018
13th September 2018
Candid Street Photography with the Lumix DC-GX9
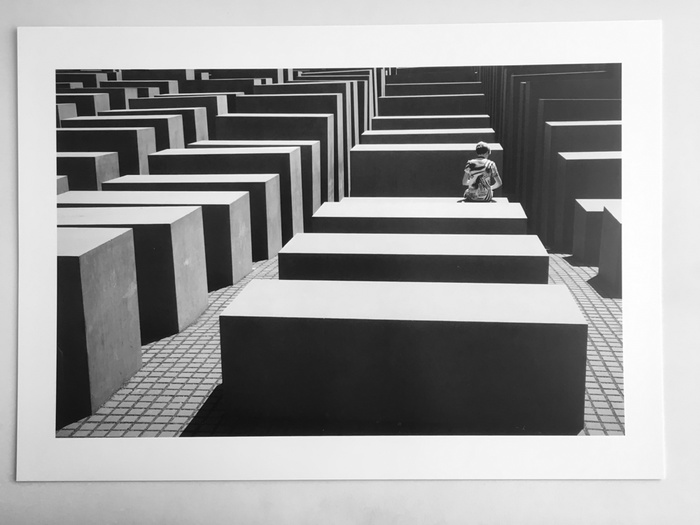
When I teach street photography workshops to beginners, one of the first things I discuss are ways to make yourself more invisible and covert as is possible with the kit you have. When choosing a camera, you want a model that makes you feel comfortable in the streets. portable and easy to use to get the results you want fast and without drawing too much attention to yourself. The essence of a candid moment is lost once the subjects are aware they are being photographed.
The Lumix GX9 has a few useful features I have found useful in regard to this method of discreet street shooting. Let's review some of these features:
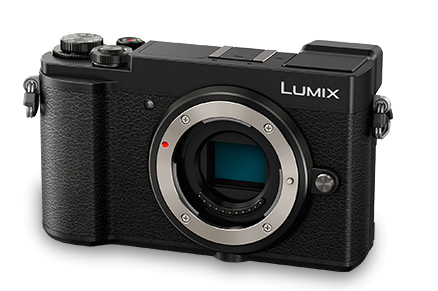
1. The body size of the GX9 is portable and sleek in style and size, with no buttons or dials on the front of the camera to draw attention.
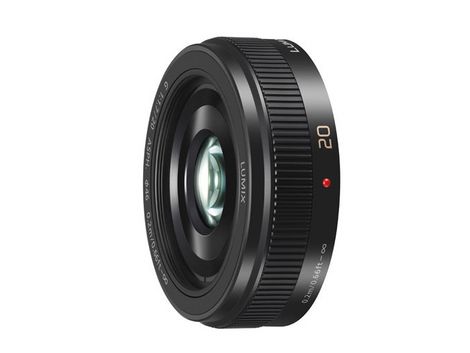
2. Optional prime lenses which are generally smaller in size compared to a zoom lens helps you with your portable kit set up.
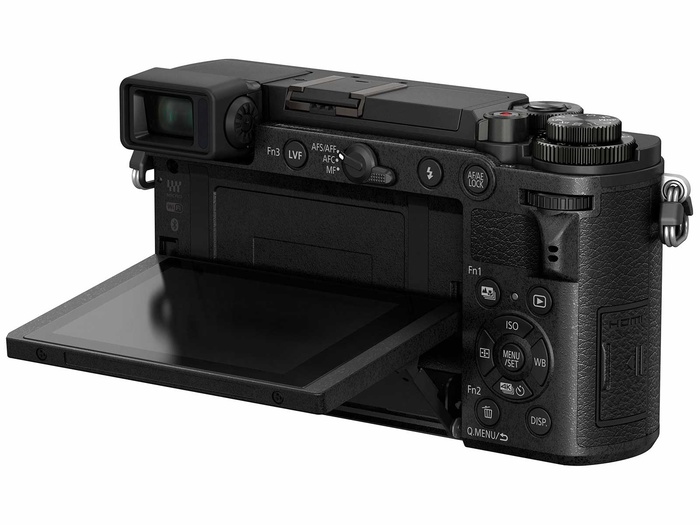
3. Tiltable LCD Screen - a useful discretional feature when utilised instead of bringing the camera up to your eye to frame your shots.
4. Touch Screen - Among the customisable touch screen settings is the ability to trigger the shutter at a touch of any AF point you choose.
5. Silent shutter mode - A great feature you can toggle on or off when required in close proximity or in quiet locations.
Implementing these camera features will help you on your way to making great street photography images with the Lumix GX9.
When I teach street photography workshops to beginners, one of the first things I discuss are ways to make yourself more invisible and covert as is possible with the kit you have. When choosing a camera, you want a model that makes you feel comfortable in the streets. portable and easy to use to get the results you want fast and without drawing too much attention to yourself. The essence of a candid moment is lost once the subjects are aware they are being photographed.
The Lumix GX9 has a few useful features I have found useful in regard to this method of discreet street shooting. Let's review some of these features:
1. The body size of the GX9 is portable and sleek in style and size, with no buttons or dials on the front of the camera to draw attention.
2. Optional prime lenses which are generally smaller in size compared to a zoom lens helps you with your portable kit set up.
3. Tiltable LCD Screen - a useful discretional feature when utilised instead of bringing the camera up to your eye to frame your shots.
4. Touch Screen - Among the customisable touch screen settings is the ability to trigger the shutter at a touch of any AF point you choose.
5. Silent shutter mode - A great feature you can toggle on or off when required in close proximity or in quiet locations.
Implementing these camera features will help you on your way to making great street photography images with the Lumix GX9.
L.Type Prints Review
25th June 2018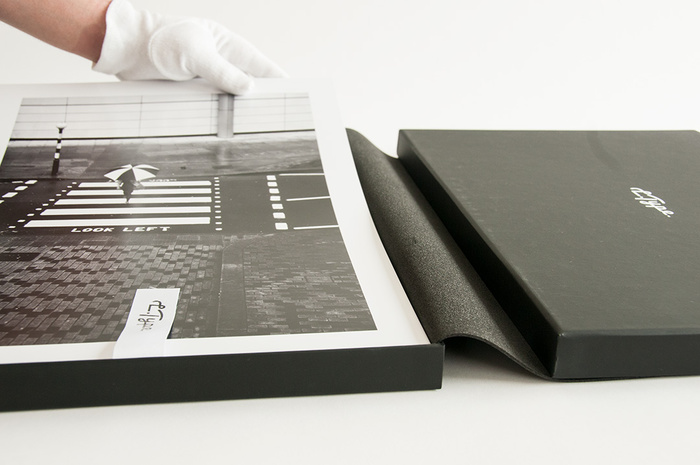
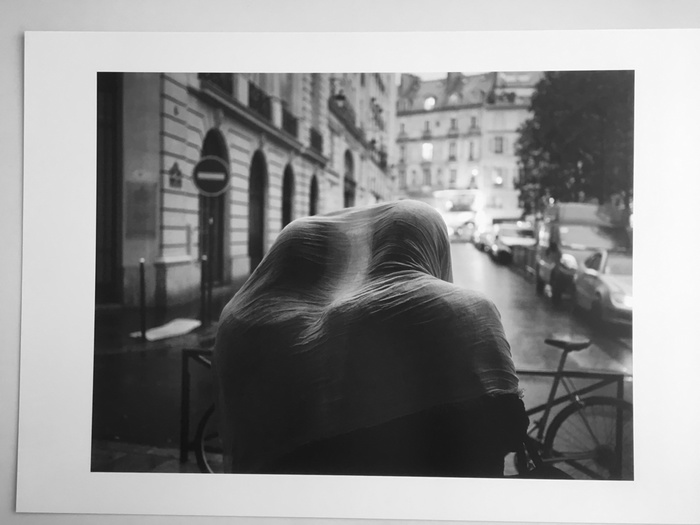
As a practicing street photographer and workshop tutor, I am also very fortunate to sell prints of my work to private collectors and commercial businesses like hotels. Being a bit of a perfectionist when it comes to how my images look even when just posting online. I am even more so fussy when it comes to how my images look when printed on paper whether for an exhibition or for art print purposes.
Over the last few years, I have accumulated folders and folders of test prints in my search to find a reliable, quality commercial printer service to fulfil my print sale orders and exhibition requirements. Some services have been good quality and some have been truly awful! It isn’t just the consistent print quality that is important, cost factors, speed to get orders out and just customer service, in general, are things I look for, when I decide which printing partner to work with, hopefully on an ongoing basis.
So, when L.Type prints got in touch and asked me if I wanted to sample the quality of their prints in exchange for an honest review, I was excited to give them a try.
To test out just how accurate their printers were, I sent them some high-res image files saved with their printer ICC (printing profile). I did no monitor calibration or any other special preparation of the image files.
On a late Friday afternoon, L.Type prints informed me that my prints would be finished and put in the post. I was very impressed that my prints arrived the following Monday via next day delivery!
The prints were extremely well packaged in a hardboard sturdy envelope. What first impresses you as you open up the package is their luxury, branded black L-Type casing that they send prints out in. Before you even see the prints, you almost expect high quality - I was not wrong. The A3 prints sent are printed on extra thick Fuji paper which makes the prints feel very luxurious indeed.
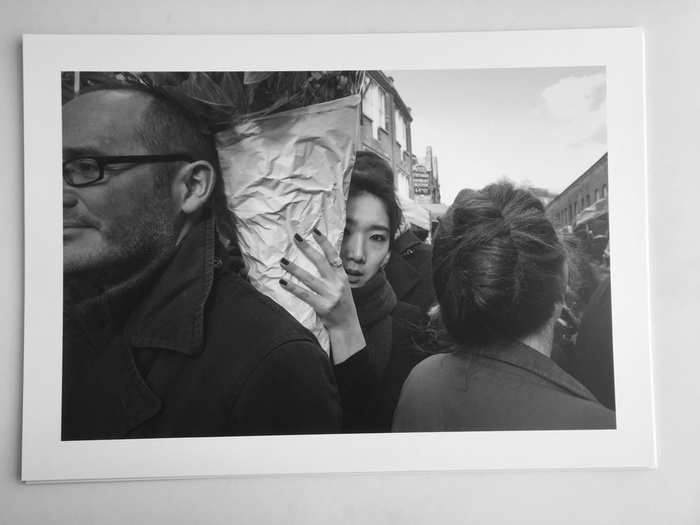
Then comes the image quality itself. The fine pixel detail of the printing is of a superior standard that I could not really fault. Considering that I had not calibrated my monitor, which when I have sent off test prints off to other printers has resulted in prints coming back either too dark or just looking tonally flat and lacklustre, these L.Type prints were sharp, tonally well balanced in contrast and brightness. I would not have any qualms about selling these as art prints or displaying them for exhibition purposes.

More about L.Type prints:
L.Type are a new small company based in the UK. They produce the world's only 400ppi true continuous tone prints available as individual prints, portfolio sets and lay-flat books. Print sizes go up to 1000mm x 305mm. Printed only on the very best Fuji professional silver halide papers to the highest standards achievable and at competitive prices. Presented and packaged beautifully in branded box sets and envelopes for maximum impact.
Special Offer!
Try L.Type prints today - get four A3 premium prints for £12 all-inclusive (saving almost £40!). Thereafter, get 15% off all print sheet orders for life. This introductory offer ends 31/07/2018.
Interested? Send your high-res images, with embedded colour profiles, to orders@l-type.com via WeTransfer, Dropbox or any other method. Simply mention LINDAWP4A312 as your promo code.
Any questions? Email info@l-type.com. Visit www.l-type.com to learn more.
25th June 2018
In: Product Reviews, Write Ups
As a practicing street photographer and workshop tutor, I am also very fortunate to sell prints of my work to private collectors and commercial businesses like hotels. Being a bit of a perfectionist when it comes to how my images look even when just posting online. I am even more so fussy when it comes to how my images look when printed on paper whether for an exhibition or for art print purposes.
Over the last few years, I have accumulated folders and folders of test prints in my search to find a reliable, quality commercial printer service to fulfil my print sale orders and exhibition requirements. Some services have been good quality and some have been truly awful! It isn’t just the consistent print quality that is important, cost factors, speed to get orders out and just customer service, in general, are things I look for, when I decide which printing partner to work with, hopefully on an ongoing basis.
So, when L.Type prints got in touch and asked me if I wanted to sample the quality of their prints in exchange for an honest review, I was excited to give them a try.
To test out just how accurate their printers were, I sent them some high-res image files saved with their printer ICC (printing profile). I did no monitor calibration or any other special preparation of the image files.
On a late Friday afternoon, L.Type prints informed me that my prints would be finished and put in the post. I was very impressed that my prints arrived the following Monday via next day delivery!
The prints were extremely well packaged in a hardboard sturdy envelope. What first impresses you as you open up the package is their luxury, branded black L-Type casing that they send prints out in. Before you even see the prints, you almost expect high quality - I was not wrong. The A3 prints sent are printed on extra thick Fuji paper which makes the prints feel very luxurious indeed.
Then comes the image quality itself. The fine pixel detail of the printing is of a superior standard that I could not really fault. Considering that I had not calibrated my monitor, which when I have sent off test prints off to other printers has resulted in prints coming back either too dark or just looking tonally flat and lacklustre, these L.Type prints were sharp, tonally well balanced in contrast and brightness. I would not have any qualms about selling these as art prints or displaying them for exhibition purposes.
More about L.Type prints:
L.Type are a new small company based in the UK. They produce the world's only 400ppi true continuous tone prints available as individual prints, portfolio sets and lay-flat books. Print sizes go up to 1000mm x 305mm. Printed only on the very best Fuji professional silver halide papers to the highest standards achievable and at competitive prices. Presented and packaged beautifully in branded box sets and envelopes for maximum impact.
Special Offer!
Try L.Type prints today - get four A3 premium prints for £12 all-inclusive (saving almost £40!). Thereafter, get 15% off all print sheet orders for life. This introductory offer ends 31/07/2018.
Interested? Send your high-res images, with embedded colour profiles, to orders@l-type.com via WeTransfer, Dropbox or any other method. Simply mention LINDAWP4A312 as your promo code.
Any questions? Email info@l-type.com. Visit www.l-type.com to learn more.
Panasonic Lumix GX9 Camera - Hands On Trial
13th February 2018
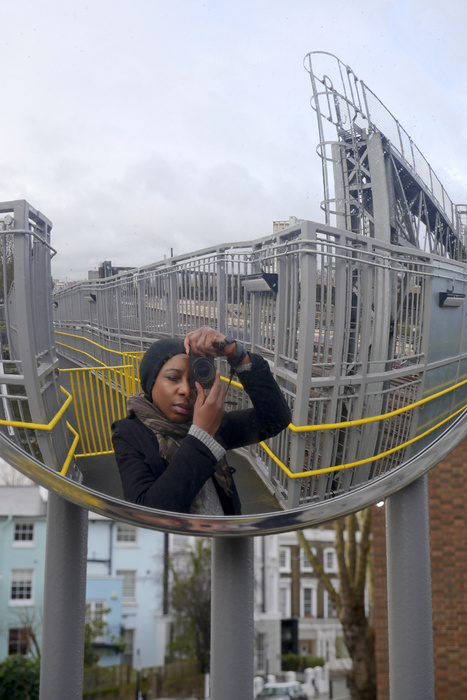
Before today’s launch, I was asked by Panasonic to test drive one of their newest Micro Four Thirds, Lumix G cameras. The GX9 is marketed as a step up to the current compact GX8. I only had a week with a hands-on test drive of the GX9, equipped with a few Lumix lenses, but my first impressions are good. Here is a round up some of the highlights…
As a street/lifestyle photographer, there are certain criteria I look for in a camera, and I would say the GX9 covers a lot of them. The body itself, which is quite compact in size, and simple in design, felt very solid and weighty in a good way. A large, well defined hand grip, so even though I wore a strap around my wrist, I never felt the camera would slip from hands, thanks to a well designed contoured grip at front and at back for the thumb. At first, I was concerned that the pad of my thumb would accidentally press function buttons at back, but thanks to a smart thumb-rest design this never happened. The large tilting touch-screen LCD screen is very sharp and clear. The ability to choose a single focus point and simply touch the screen to change that focus point position to anywhere I wanted made getting shots a breeze. An articulating EVF, which can be swiveled upwards so you are looking down to view, comes in useful for shooting at awkward angles and levels. I didn’t test out the built in Wi-Fi option this time around, but may come in very useful when on the road/travelling without a backup facility.
There are a LOT of features packed into the GX9, and also a lot of menu options to customise settings to suit your needs, which I ended up doing. I didn’t get a chance to review every single option. Instead I resorted mostly to using the handy Q MENU button on the back to get to the most commonly used settings, to make any necessary changes on the fly. Again, I didn’t really read the manual, but then the menus themselves are quite intuitive and once you have the personalised settings that you want you are ready to go.

There are only two dial knobs for simple control - the Aperture dial at the front and the shutter dial on the back. As mentioned the smart grip design meant that I was able to continue looking through the viewfinder to see my changes, while instinctively adjusting the appropriate dial settings without having to look at the camera. This functionality came in handy when shooting candid street scenes. Coupled with a 20MP sensor, fast auto focus, a high burst rate with no buffer lag, I felt assured that I would never miss a moment. I tested out the 4K Photo option, which allows you to record a 4k video then select and save a high quality 4k photo frame. Ideal when you want to grab the perfect moment in fast moving action giving you a great sharp shot.
Other useful features include a silent shutter mode, which came in really handy for close up candid shots in quieter locations. I dabbled with some of the in-camera filters, typically sticking with the ‘street photography’ monochrome filters, which are a fun feature to have if you don’t shoot RAW. Another useful feature is the ability to set a minimum shutter speed and a maximum ISO range number. Pushing the ISO to 3200 on a night shoot, I was still able to produce decent quality images. Thanks to built in image stablisation, I was also able to lower my shutter speeds a little lower then usual, without the effects of camera shake. Overall, the GX9 was a pleasure to use, and managed to produce high quality, sharp images that I was impressed with.
13th February 2018
In: Product Reviews, Write Ups
Before today’s launch, I was asked by Panasonic to test drive one of their newest Micro Four Thirds, Lumix G cameras. The GX9 is marketed as a step up to the current compact GX8. I only had a week with a hands-on test drive of the GX9, equipped with a few Lumix lenses, but my first impressions are good. Here is a round up some of the highlights…
As a street/lifestyle photographer, there are certain criteria I look for in a camera, and I would say the GX9 covers a lot of them. The body itself, which is quite compact in size, and simple in design, felt very solid and weighty in a good way. A large, well defined hand grip, so even though I wore a strap around my wrist, I never felt the camera would slip from hands, thanks to a well designed contoured grip at front and at back for the thumb. At first, I was concerned that the pad of my thumb would accidentally press function buttons at back, but thanks to a smart thumb-rest design this never happened. The large tilting touch-screen LCD screen is very sharp and clear. The ability to choose a single focus point and simply touch the screen to change that focus point position to anywhere I wanted made getting shots a breeze. An articulating EVF, which can be swiveled upwards so you are looking down to view, comes in useful for shooting at awkward angles and levels. I didn’t test out the built in Wi-Fi option this time around, but may come in very useful when on the road/travelling without a backup facility.
There are a LOT of features packed into the GX9, and also a lot of menu options to customise settings to suit your needs, which I ended up doing. I didn’t get a chance to review every single option. Instead I resorted mostly to using the handy Q MENU button on the back to get to the most commonly used settings, to make any necessary changes on the fly. Again, I didn’t really read the manual, but then the menus themselves are quite intuitive and once you have the personalised settings that you want you are ready to go.
There are only two dial knobs for simple control - the Aperture dial at the front and the shutter dial on the back. As mentioned the smart grip design meant that I was able to continue looking through the viewfinder to see my changes, while instinctively adjusting the appropriate dial settings without having to look at the camera. This functionality came in handy when shooting candid street scenes. Coupled with a 20MP sensor, fast auto focus, a high burst rate with no buffer lag, I felt assured that I would never miss a moment. I tested out the 4K Photo option, which allows you to record a 4k video then select and save a high quality 4k photo frame. Ideal when you want to grab the perfect moment in fast moving action giving you a great sharp shot.
Other useful features include a silent shutter mode, which came in really handy for close up candid shots in quieter locations. I dabbled with some of the in-camera filters, typically sticking with the ‘street photography’ monochrome filters, which are a fun feature to have if you don’t shoot RAW. Another useful feature is the ability to set a minimum shutter speed and a maximum ISO range number. Pushing the ISO to 3200 on a night shoot, I was still able to produce decent quality images. Thanks to built in image stablisation, I was also able to lower my shutter speeds a little lower then usual, without the effects of camera shake. Overall, the GX9 was a pleasure to use, and managed to produce high quality, sharp images that I was impressed with.