BLOG - Tips & Advice
London Street Photography - Private Photo Tours - 14th July 2025
21st July 2025
21st July 2025
Some snapshots from another recent private London photo tour for guests visiting from Malaysia.
To enquire about booking your own private London photography tour or workshop with me, drop us an email for more info and cost. Choose your preferred date, hours and photography interests and I will put together an affordable, personalised schedule for you!


To enquire about booking your own private London photography tour or workshop with me, drop us an email for more info and cost. Choose your preferred date, hours and photography interests and I will put together an affordable, personalised schedule for you!
Street Photography Edition of Amateur Photographer Magazine
30th September 2021
Street Photography Edition of Amateur Photographer Magazine
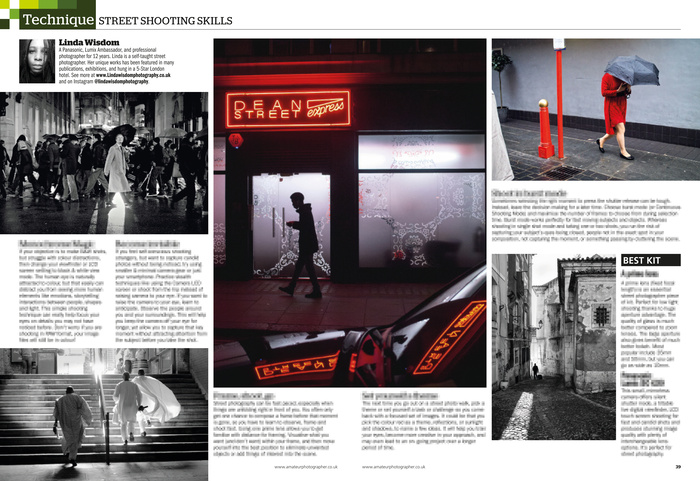
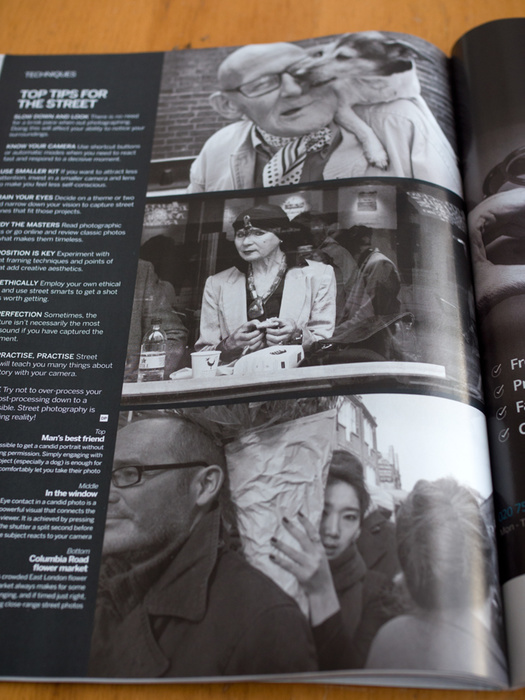
I'm thrilled to be part of this street photography special, premium issue of Amateur Photographer magazine on sale today! 😊 In it, I reveal some of my top tips & techniques in shooting for success in the streets. This issue also includes features on Nick Turpin of iN-PUBLIC, articles written by Peter Dench and advice on th best cameras to use for street photography, as well as advise on discreet smartphone candid photos! Pick yourself up a copy - out now in all good newsagents or order online.
Click here for larger view
30th September 2021
Street Photography Edition of Amateur Photographer Magazine
I'm thrilled to be part of this street photography special, premium issue of Amateur Photographer magazine on sale today! 😊 In it, I reveal some of my top tips & techniques in shooting for success in the streets. This issue also includes features on Nick Turpin of iN-PUBLIC, articles written by Peter Dench and advice on th best cameras to use for street photography, as well as advise on discreet smartphone candid photos! Pick yourself up a copy - out now in all good newsagents or order online.
Click here for larger view
Lumix GX9 auto settings and modes for street photography
29th August 2020
29th August 2020
Lumix GX9 auto settings and modes for street photography
One of the most common questions from newcomers is ‘what settings should I be using for street shots”?
There isnʼt one straight answer to that, but it will depend on the type of photos you are wanting to make. In the case of street photography, unlike other genres, there are usually no second chances to shoot a candid moment as it happens. In addition, you probably want to focus your attention on ‘seeingʼ and less on worrying about camera technicalities. As you may have experienced, the most common technical issues a street photographer can hazard are motion blur from camera shake or moving people, overexposure or underexposure. These problems can be reduced if you take advantage of the GX9ʼs auto menu options.
Configuring these options is very easy as shown in the images.
Step 1.
(A)perture or (P)rogram modes
In order to access the minimum shutter speed menu option, you need to be in either Aperture dial mode or Program mode. The option will be greyed out if you are in Manual or Shutter Speed mode.

Step 2.
Auto ISO
The next step is to utilise the Auto ISO setting (or selecting the highest suitable ISO value). Do bear in mind the higher the ISO number, the grainer your photos become. This ISO option is in the first menu under the camera icon.

Step 3.
Minimum shutter speed
The GX9 model has built-in image stabilisation and also has a useful ‘Minimum Shutter Speedʼ option, which you can set to any standard value, i.e. 1/100, 1/80. This is particularly useful to avoid camera shake at too low shutter speeds around 1/40 or lower. This option is in the first menu under the camera icon.
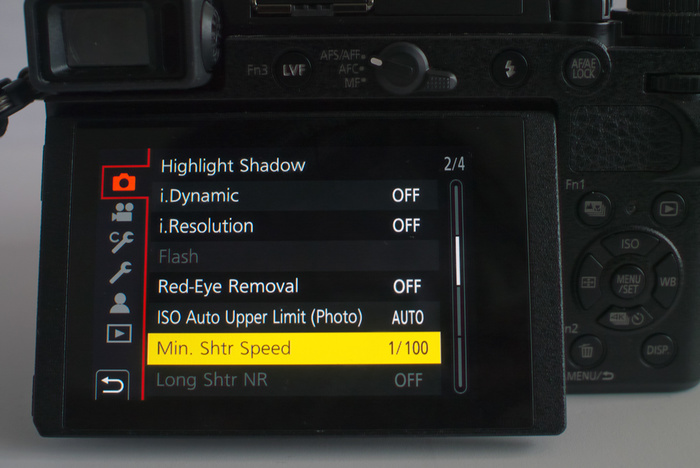

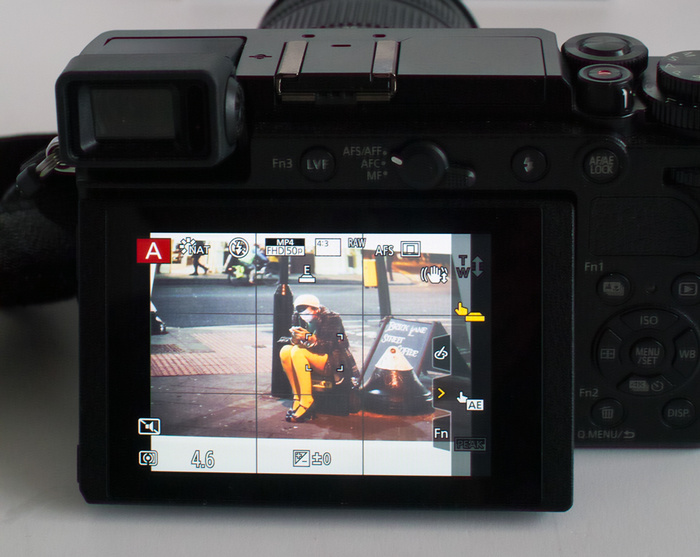
Once you have configured these settings and return to the main live view screen, you will see the minimum shutter speed you set will be displayed. As long as you have a wide enough Aperture range, along with your Auto ISO set in place, the chosen Shutter Speed should never go below the minimum value you set, thus minimalising the issue of motion blur. It is a nice option when shooting street and using Aperture priority mode.
One of the most common questions from newcomers is ‘what settings should I be using for street shots”?
There isnʼt one straight answer to that, but it will depend on the type of photos you are wanting to make. In the case of street photography, unlike other genres, there are usually no second chances to shoot a candid moment as it happens. In addition, you probably want to focus your attention on ‘seeingʼ and less on worrying about camera technicalities. As you may have experienced, the most common technical issues a street photographer can hazard are motion blur from camera shake or moving people, overexposure or underexposure. These problems can be reduced if you take advantage of the GX9ʼs auto menu options.
Configuring these options is very easy as shown in the images.
Step 1.
(A)perture or (P)rogram modes
In order to access the minimum shutter speed menu option, you need to be in either Aperture dial mode or Program mode. The option will be greyed out if you are in Manual or Shutter Speed mode.
Step 2.
Auto ISO
The next step is to utilise the Auto ISO setting (or selecting the highest suitable ISO value). Do bear in mind the higher the ISO number, the grainer your photos become. This ISO option is in the first menu under the camera icon.
Step 3.
Minimum shutter speed
The GX9 model has built-in image stabilisation and also has a useful ‘Minimum Shutter Speedʼ option, which you can set to any standard value, i.e. 1/100, 1/80. This is particularly useful to avoid camera shake at too low shutter speeds around 1/40 or lower. This option is in the first menu under the camera icon.
Once you have configured these settings and return to the main live view screen, you will see the minimum shutter speed you set will be displayed. As long as you have a wide enough Aperture range, along with your Auto ISO set in place, the chosen Shutter Speed should never go below the minimum value you set, thus minimalising the issue of motion blur. It is a nice option when shooting street and using Aperture priority mode.
Taking Candid Street Photography with the Lumix GX9
13th September 2018
13th September 2018
Candid Street Photography with the Lumix DC-GX9
When I teach street photography workshops to beginners, one of the first things I discuss are ways to make yourself more invisible and covert as is possible with the kit you have. When choosing a camera, you want a model that makes you feel comfortable in the streets. portable and easy to use to get the results you want fast and without drawing too much attention to yourself. The essence of a candid moment is lost once the subjects are aware they are being photographed.
The Lumix GX9 has a few useful features I have found useful in regard to this method of discreet street shooting. Let's review some of these features:
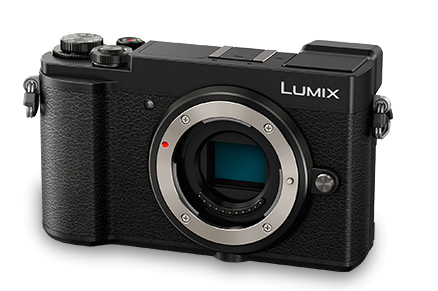
1. The body size of the GX9 is portable and sleek in style and size, with no buttons or dials on the front of the camera to draw attention.
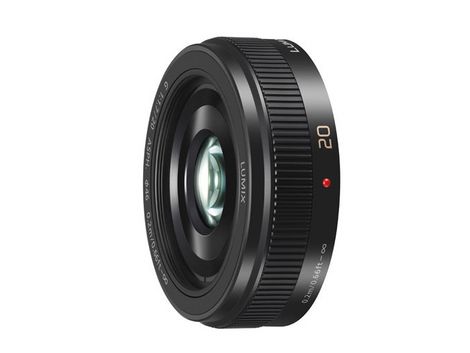
2. Optional prime lenses which are generally smaller in size compared to a zoom lens helps you with your portable kit set up.
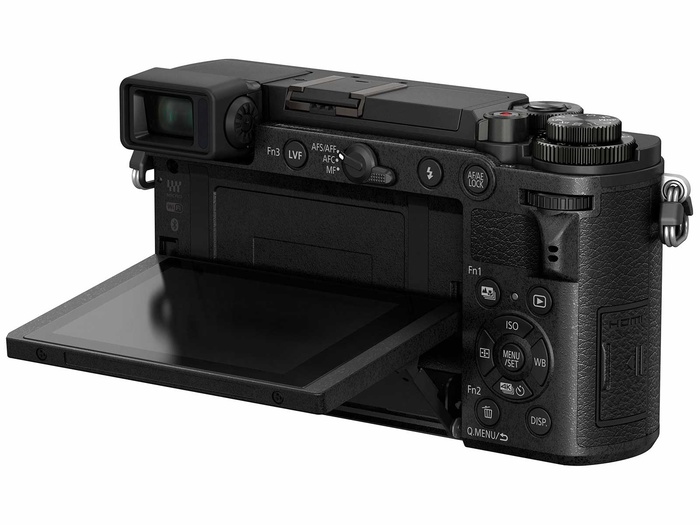
3. Tiltable LCD Screen - a useful discretional feature when utilised instead of bringing the camera up to your eye to frame your shots.
4. Touch Screen - Among the customisable touch screen settings is the ability to trigger the shutter at a touch of any AF point you choose.
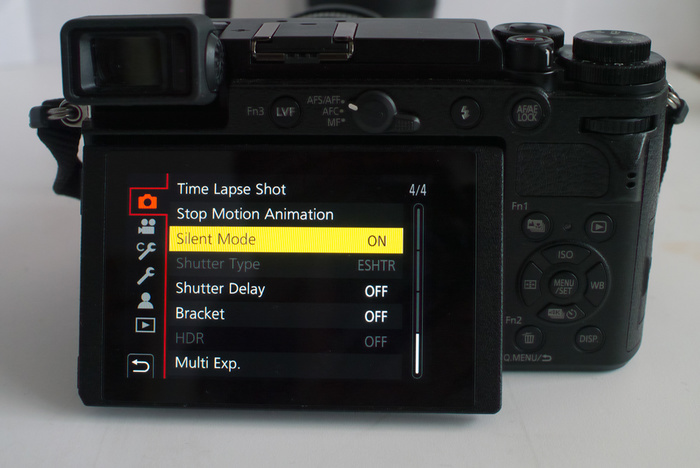
5. Silent shutter mode - A great feature you can toggle on or off when required in close proximity or in quiet locations.
Implementing these camera features will help you on your way to making great street photography images with the Lumix GX9.
When I teach street photography workshops to beginners, one of the first things I discuss are ways to make yourself more invisible and covert as is possible with the kit you have. When choosing a camera, you want a model that makes you feel comfortable in the streets. portable and easy to use to get the results you want fast and without drawing too much attention to yourself. The essence of a candid moment is lost once the subjects are aware they are being photographed.
The Lumix GX9 has a few useful features I have found useful in regard to this method of discreet street shooting. Let's review some of these features:
1. The body size of the GX9 is portable and sleek in style and size, with no buttons or dials on the front of the camera to draw attention.
2. Optional prime lenses which are generally smaller in size compared to a zoom lens helps you with your portable kit set up.
3. Tiltable LCD Screen - a useful discretional feature when utilised instead of bringing the camera up to your eye to frame your shots.
4. Touch Screen - Among the customisable touch screen settings is the ability to trigger the shutter at a touch of any AF point you choose.
5. Silent shutter mode - A great feature you can toggle on or off when required in close proximity or in quiet locations.
Implementing these camera features will help you on your way to making great street photography images with the Lumix GX9.
The Decisive Moment - Digital Photographer Magazine feature
06th August 2018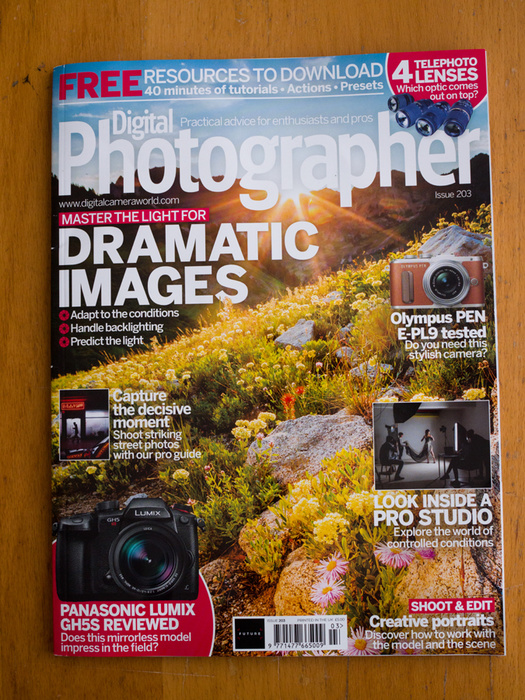
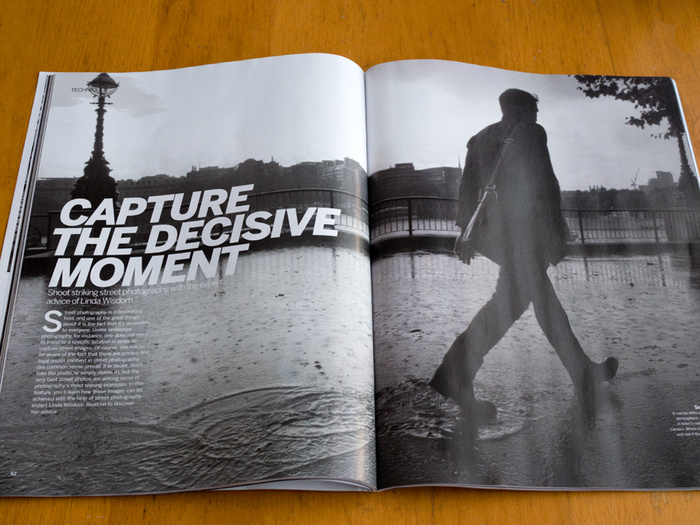
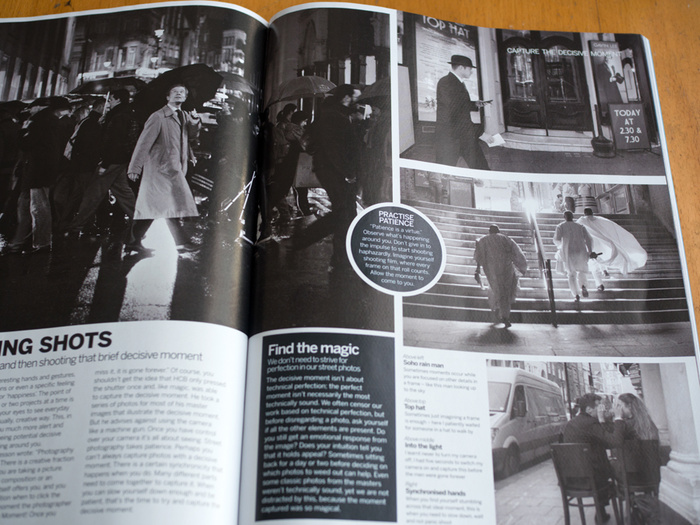
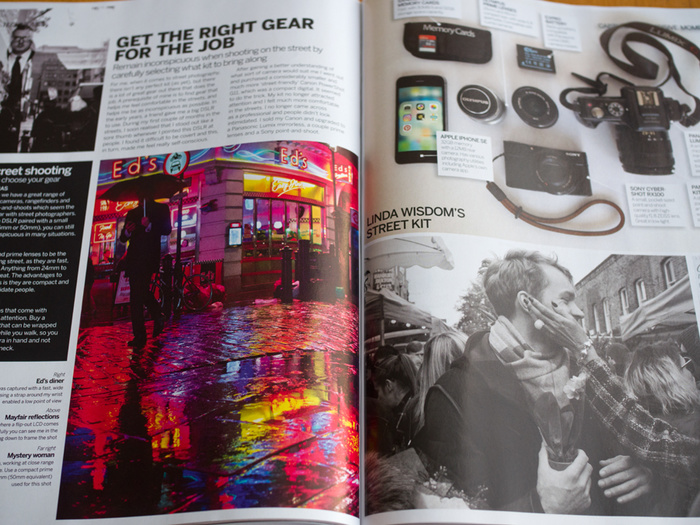
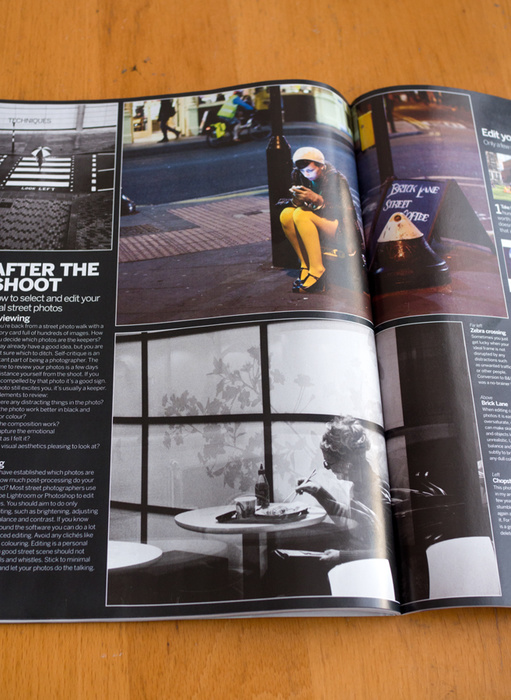
I have a 5-page spread feature in the latest issue of Digital Photographer magazine. The main topic of interest is 'The Decisive Moment', where I reveal some in-depth tips and tricks into how I make, take and edit my street photography shots and a whole lot more!
Issue #203 is available to purchase online for just £5.00 includes shipping.
06th August 2018
I have a 5-page spread feature in the latest issue of Digital Photographer magazine. The main topic of interest is 'The Decisive Moment', where I reveal some in-depth tips and tricks into how I make, take and edit my street photography shots and a whole lot more!
Issue #203 is available to purchase online for just £5.00 includes shipping.
London street photography workshops for 2018
12th January 2018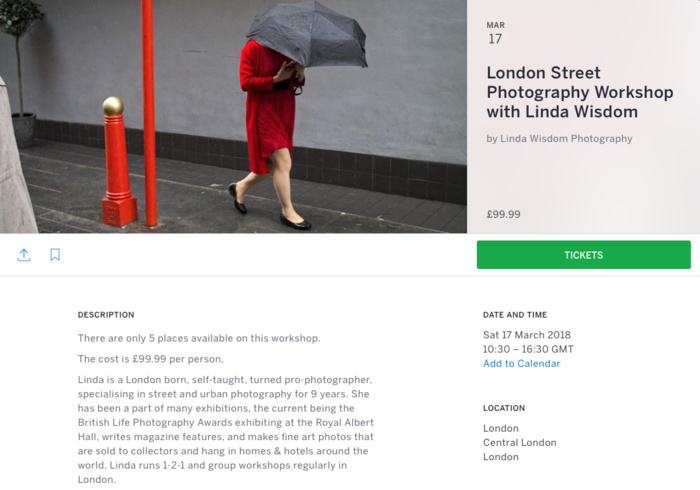
I am excited to be hosting a new set of street photography workshops in London this new year. There are only 5 places available on this full day workshop. The cost is £99.99 per person. The first London workshop will take place on Saturday, 17th March 2018.
The first street photography workshop is suitable for professional and amateur photographers of all levels and will touch upon the following subjects:
• Learn how to anticipate the moment
• Develop confidence in photographing people on the street
• Ethics, laws and how to deal with challenges
• Varying styles of street photography and discovering your style
• Use black and white for atmospheric street photography
• Explore colour to create impact
• Use light to shape dramatic street photography
• Explore the use of various visual elements to enhance images
• Practical camera techniques to apply in street photography
• Use varying speeds to freeze or exaggerate movement
• Use depth of field for different effects
• Learn composition styles that work in street photography
• Evaluate your photographs – what worked and what didn’t
For full details, to book your space on the workshop, and take your street photography to the next level in 2018, please visit my workshop booking website.
BOOK YOUR TICKET
Street Photography Tips - Be your own worst critic!
25th October 2017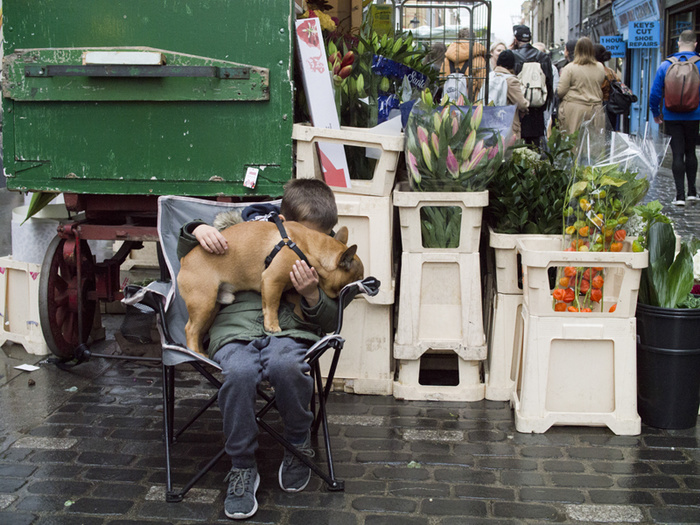
When you come home from a photo walk, toss your memory card into your computer to review your shots, are you often disappointed with the final results? Maybe your photos are blurry, or maybe you wish you had taking a shot from a different angle because something in it is distracting, or the subjects eyes are closed in the one shot you rushed to take, or a special moment you saw just isn't coming through in your photos?
A big part of my role as street photography tutor is giving the student the confidence to take candid photos of strangers in the first place and not just snap a quick shot in a blind panic and run away! I initially lead by example and to demonstrate my techniques, I go shoot a scene at my preferred focal length (which is usually much closer than the students initially). Occasionally, a student is still on the other side of the road in fear. I give them the creative incentive to come closer and focus on the frame and not worry too much about who's looking at them. This usually encourages them to take their time and not rush the job. We then review the shot(s) as they are taken, and if necessary I suggest tips to make the photo better.
A good exercise for a street photographer is to work a scene with your own eyes or preferably through your camera's viewfinder. What I mean by that is to do a 180-360° on the scene. Two examples: Ask yourself does the shot work better from the left or the right side, from lower angle or from eye level? Is there anything distracting in the frame? Should i bokeh out the background or is the background adding context to my shot, etc.
I teach students not to rush a shot unnecessarily. Of course this is a little easier if; 1. the subject(s) are not on the move 2. The subject(s) are too occupied to notice you 3. The subject(s) are unaffected by you taking photos. In doing so, you are learning to think about your composition (which I explain in more detail in my workshops), but most importantly how and when to capture the most emotionally expressive or visually impactful moment from the subject/scene.
There's nothing wrong with taking a few shots of the same scene, going home and picking the best one to use. Many of the masters of street photography including; Henri Cartier-Bresson, Elliot Erwitt, Martin Parr, etc did/do exactly that with analog cameras. Just google their names plus the words 'contact sheets' for a master class lesson in observation, timing, composition. The next job once you have the shots you want is being meticulous in your final image selection. Most of the iconic shots you see, went through through these processes and have stood the test of time as classic photographs.
In my workshops you will learn to train your eyes to notice more details, moods and emotions, I teach you how to start to see interesting scenes, the confidence to go and take the shot, how to creatively compose your images and when to take your shots to convey the most impact through timing and story telling and critic your work.
If you would like to book one of my workshops, you can either sign up to one of my next Airbnb Experiences or if you prefer a private 1-2-1 please email me for further details.
Shooting at close range - Street Photography Workshops
20th July 2017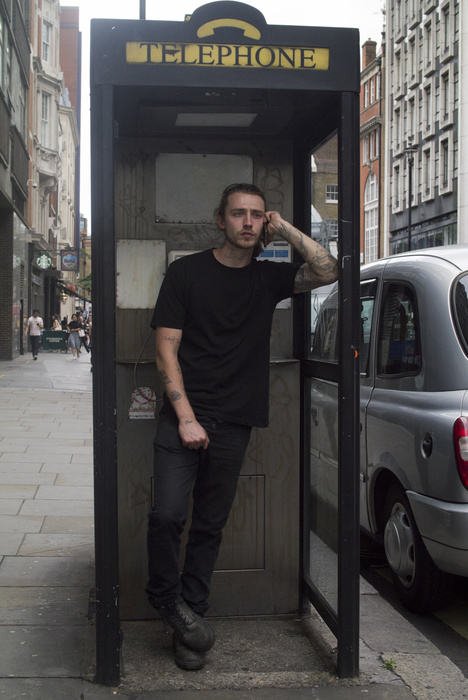
Soho, London 2017
A part of my street photo workshops involves teaching covert techniques & confidence tips to shoot people at close range. Seeing as I have to lead by example, I end up taking 100s of close up pics so they can see me in action and to invite them out of their comfort zone, which for some, starts on the other side of the road. But towards the end of the workshop, they are so in the 'zone' they forget to be afraid and shoot at my distance or a much closer range then they did at the start.
This method allows you to take a better composed photo by putting your creativity and composition first, instead of any fear or doubt about taking the photo and missing the moment.
Not all street photography styles involves shooting at close range, but when you do, it can often make for a more compelling photo, especially street portraits or interactions between people expressing emotions, moods or other characteristics that would be hard to connect with if shoot from too far away.
The 7 Essential Rules of Street Photography - Article
12th June 2017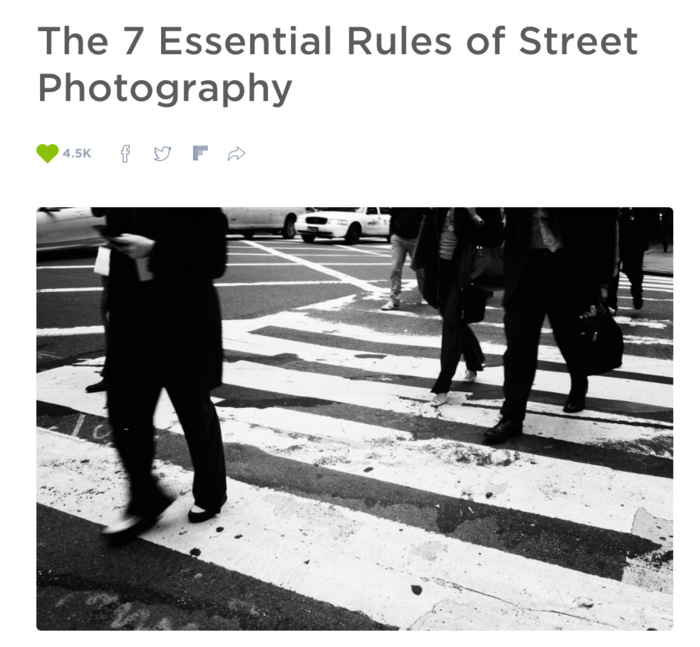
The 7 Essential Rules of Street Photography
Check out a new article on Photographytalk.com website, offering some helpful beginner street photography tips! I was asked to contribute some street photography 'wisdom' to the article which I hope you find useful. Happy shooting!
12th June 2017
In: Tips & Advice, Write Ups
The 7 Essential Rules of Street Photography
Check out a new article on Photographytalk.com website, offering some helpful beginner street photography tips! I was asked to contribute some street photography 'wisdom' to the article which I hope you find useful. Happy shooting!
Why you should never delete your photos
20th May 2016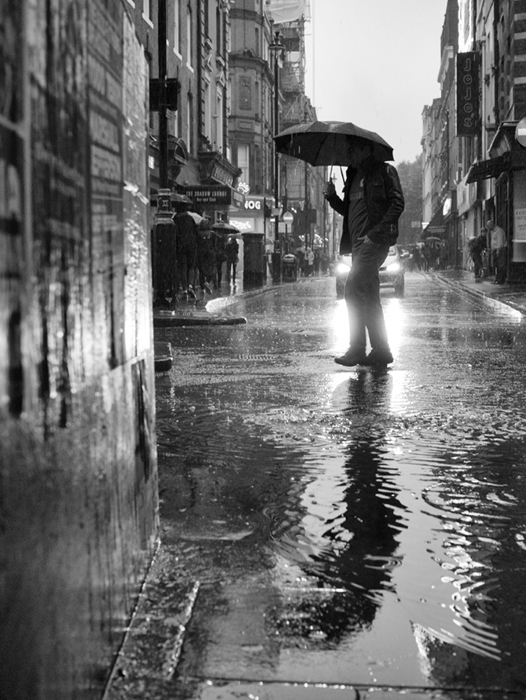
A rainy day photograph I found in the 'Vaults' today. This was taken in Soho, London September 2015. I was out on a photo walk, one of the evenings after some heavy downpour in the UK that flooded most of the country. I took a few shots from this Soho location, but at the time, I wasn't sure which shot from the series was my overall favourite. A few months on, it turns out its this one I like the best. The moral of this story is never delete the photos from your camera, no matter how rubbish you think it looks at the time. Even when you get home and look at them on your big screen monitor and you are still unsure about what to keep and what to delete, for whatever reason.
If you are not sure about a shot, store it away - keep it, back it up somewhere. There are so many freebie 'cloud storage' services available if you don't have a USB stick drive, a portable hard drive to copy your image files to. I'm quite religious with my backups now after almost losing ALL of my original files stored on a failing hard drive.
After every photo walk I do, I create & name a new folder on my Mac with the date and location of the shoot for my reference (i.e 20 May 2016 - Soho). As I review the photos from that shoot, I save the usable files (one high res & one low res) in that folder, this then gets auto backed up to my portable hard drive via Time Machine, and then this is copied to my Google Drive cloud storage area, so if both my Mac and portable drive go up in flames, I still have my cloud copies! Yes I'm a tad organised, but it is for very good reason. I'm not just overly OCD!
If like myself, you make and sell prints of your work, you need to be able to find that file for processing. I will get a print enquiry from someone about a photo that I shared on one of my social media pages. If you don't know, some of my shared street photography images date back to 2009. That's over 7 years worth of photos, that's tens of thousands of images I need to easily access and find that high res version of a specific file efficiently. Thinking back to before I had this filing system, it was virtually impossible to find image files I was looking for. I just randomly saved my images to some folder or just threw them on the Mac desktop. But now I have my 'vault', it is so much more simple to find and grab any file when I need it, especially when I have a deadline to send an image file to the printing lab. It just makes my life a whole lot easier.
Another reason I keep my files, is every so often I review a batch of older images that I've taken. They that didn't make the original cut for whatever reason and occasionally find an image I really like from that bunch, and think why didn't I notice this one before. It could be for one or a number of reasons: a) I didn't think it was visually strong enough or b) I wasn't sure it was the strongest in the series I took or even c) maybe it was not perfect in your mind, but your style may have changed or maybe now you just don't mind quirky imperfections! d) other. Every photographer should have a 'vault', a personal collection, containing your body of work that you can return to, dip into, review, rework, get inspiration from.
What have I learnt from this? Simply taking a step back from my own photos, if that's a week, a month, or a year; disconnecting myself emotionally from my images, and revisiting them from almost 'another persons' point of view, can make you see them completely differently. I have occasionally found a few gems such as this one, that I had completely forgotten that actually ended up growing on me!
This image is available as a photographic print here.
20th May 2016
In: Tips & Advice
A rainy day photograph I found in the 'Vaults' today. This was taken in Soho, London September 2015. I was out on a photo walk, one of the evenings after some heavy downpour in the UK that flooded most of the country. I took a few shots from this Soho location, but at the time, I wasn't sure which shot from the series was my overall favourite. A few months on, it turns out its this one I like the best. The moral of this story is never delete the photos from your camera, no matter how rubbish you think it looks at the time. Even when you get home and look at them on your big screen monitor and you are still unsure about what to keep and what to delete, for whatever reason.
If you are not sure about a shot, store it away - keep it, back it up somewhere. There are so many freebie 'cloud storage' services available if you don't have a USB stick drive, a portable hard drive to copy your image files to. I'm quite religious with my backups now after almost losing ALL of my original files stored on a failing hard drive.
After every photo walk I do, I create & name a new folder on my Mac with the date and location of the shoot for my reference (i.e 20 May 2016 - Soho). As I review the photos from that shoot, I save the usable files (one high res & one low res) in that folder, this then gets auto backed up to my portable hard drive via Time Machine, and then this is copied to my Google Drive cloud storage area, so if both my Mac and portable drive go up in flames, I still have my cloud copies! Yes I'm a tad organised, but it is for very good reason. I'm not just overly OCD!
If like myself, you make and sell prints of your work, you need to be able to find that file for processing. I will get a print enquiry from someone about a photo that I shared on one of my social media pages. If you don't know, some of my shared street photography images date back to 2009. That's over 7 years worth of photos, that's tens of thousands of images I need to easily access and find that high res version of a specific file efficiently. Thinking back to before I had this filing system, it was virtually impossible to find image files I was looking for. I just randomly saved my images to some folder or just threw them on the Mac desktop. But now I have my 'vault', it is so much more simple to find and grab any file when I need it, especially when I have a deadline to send an image file to the printing lab. It just makes my life a whole lot easier.
Another reason I keep my files, is every so often I review a batch of older images that I've taken. They that didn't make the original cut for whatever reason and occasionally find an image I really like from that bunch, and think why didn't I notice this one before. It could be for one or a number of reasons: a) I didn't think it was visually strong enough or b) I wasn't sure it was the strongest in the series I took or even c) maybe it was not perfect in your mind, but your style may have changed or maybe now you just don't mind quirky imperfections! d) other. Every photographer should have a 'vault', a personal collection, containing your body of work that you can return to, dip into, review, rework, get inspiration from.
What have I learnt from this? Simply taking a step back from my own photos, if that's a week, a month, or a year; disconnecting myself emotionally from my images, and revisiting them from almost 'another persons' point of view, can make you see them completely differently. I have occasionally found a few gems such as this one, that I had completely forgotten that actually ended up growing on me!
This image is available as a photographic print here.